The resin surfacing system is of two types- the resin bound gravel and the resin bonded gravel. These two should not be confused with each other as they differ in appearance, method of installation and other physical properties.
The resin bonded system closely resembles the loose gravel system in appearance. However, it offers the distinct advantage of eliminating mobile aggregates. Here, the stones are bonded to the resin which also reduces its maintenance requirement.

Most often, it is used for traditional and historic looking properties where you may not necessarily use a resin bound system. The finished surface gives off a textured look which is ideal for disabled ramps thanks to its high anti-slip quality even on sloped areas.
The resin bonded gravel is also ideal for areas with light vehicle traffic and is durable when used and maintained properly. However, it is not as durable as the bound resin system.
The resin bonded gravel sometimes known as “scatter coat” is made by first applying resin onto a suitable base which may be non-porous fine wearing coarse asphalt or concrete base. Thereafter, aggregate stones are sprinkled or scattered onto the resin.
The system offers great visual appeal and comes in various designs and range of colours offering you a high level of design flexibility. With maximum colours and sizes available on our catalogue, you will most certainly find your choice and what suits your home perfectly. Inasmuch as it is not a permeable solution, it is very cost effective.
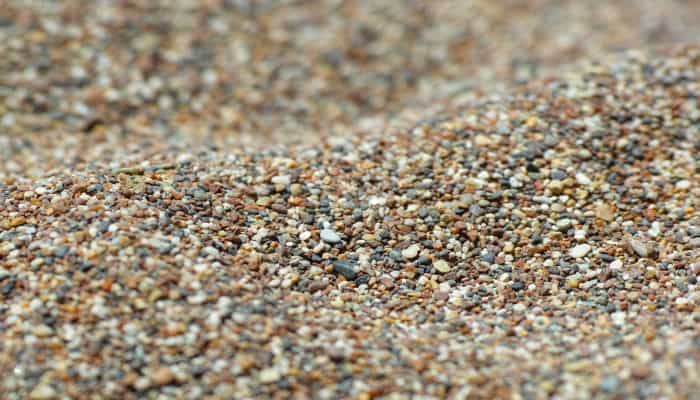
Usually, the recommended thickness of the resin bonded gravel system is between 4-6mm and can easily be laid on existing suitable bases without the need for excavation or resurfacing. Furthermore, the ideal stone size should be between 1-3mm which provides excellent uniform finish and adhesion to the resin.
| RESIN BONDED SURFACING | RESIN BOUND SURFACING |
|---|---|
| Gravel is scattered on the surface of an already applied resin | The aggregate is mixed in with the resin. |
| Usually, majority of the stones will bond to the resin while some on the top will be loose. Excess stones can be removed after the curing process is completed. | The resulting material is trowelled onto the intended driveway surface evenly. |
| The surface is a textured finish which gives the appearance of loose gravel. | The resin bound paving surface is a smooth, flat finish with no loose gravel. |
| This surface is a non-porous, non-permeable and non-SUDS compliant solution. | The surface is a permeable, porous surface allowing water to drain through. It is also SUDS compliant |
| The solution is not as durable as resin bound and there is increased maintenance requirement over time when the stones begin to work loose. | The surface is hard wearing, very durable, weed resistant and requires low maintenance. |
| You require a UK Planning permit to install one. | Being SUDS compliant, you do not require a UK planning permit to install one for your home. |
| There is a need to install an additional drainage system to prevent water pools on the surface and reduce chances of flooding. | There is no need for an additional drainage channel since the water drains through the surface to the water bed. |

Resin bonded surfaces are cheaper to install than the resin bound systems. On the average, it will cost about £26-£40 per m2 to install a bonded resin system.
Please be informed that this is not definite as the final cost of a resin bonded drive can vary and is influenced by several factors. Get in touch for a free quote today!

Here are some of factors that influence the cost of resin bonded gravel installation;
While we recommend that you reach out to experts to carry out the installation of your bonded resin gravel driveway, some people would want to carry out the process as a DIY project. We will give you a breakdown of how to go about it.
The installation process is divided into three main processes;
Surface preparation is very essential to the long term success of your resin bonded gravel driveway. There should not be any form of contaminant which may interfere and affect the bonding of the resin to the base. Ensure that the surface is clean, and dry.
Additionally, be sure that the surface is suitable and in good condition to bear a driveway. If it is not, you will need an expert to do some excavation work, prepare the surface and ensure it is in perfect condition to carry your driveway. It must be said that most driveways that fail are because the base wasn't properly installed. When the base is poorly done, cracks will appear on the drive. Also, the drive could swell or cave in.
As part of the surface preparation, you may need to prime the surface especially if you are laying your drive on a concrete base. This will ensure that a strong bond is created.
The primer which usually sets in about 90 minutes consists of a fast curing epoxy primer and C52 sand scattered onto it.
The process of mixing the resin follows that you follow the manufacturer's instruction as to the ratio of resin to hardener to be used. Mix both contents separately and then combine both before mixing for about 5 minutes. You will need an electric drill, mixing paddle and a wide bladed tool for the mixing process. Ensure you reach down to the base and work around the sides of the container so that you will incorporate all liquid and ensure a thorough mix.
Once your mixing process is completed, transfer the mix to the installation area. Spread a layer of resin onto the surface using a serrated squeegee. Then after about 5 minutes, scatter the desired aggregate stones over the resin. You may also use pre-coated stones or apply some resin over the scattered stones to seal the gravels in place. We recommend that installation be done in ambient temperatures (15°C or above).
After 24 hours, use a sweeping brush to get rid of an excess or loose resin bonded aggregate from the surface.

While the bonded resin system has its advantages, a major drawback to note is that it is not permeable as it lacks a porous surface. As a result, water cannot pass through and therefore necessitates having an additional drainage system to prevent run-off which could lead to flooding. Additionally, you will require a UK planning permission to install one for your home.
Also, overtime, there will be loose stones which may migrate from their positions leaving off ugly looking bald patches. This will mean that you have to constantly have to shovel stones back into place or reach out to an installation expert for proper repair.
At YourResinDriveway, we provide our clients with excellent and high quality resin bonded installation as well as efficient customer service and after sale support. The resin bonded gravel solutions we offer are versatile as they can fit in any traditional setting as well as urban areas.
Reach out to us via our call lines 01544 303 021 for professional resin bonded gravel driveway installation. We work with professional installers across the UK.
Alternatively, fill out our online forms and request for a free quote and we will reach out to you without delay.