Important Steps to Install a DIY Resin Bound Gravel Driveway, Path or Patio
Resin driveways are of two types which are the resin bonded and the resin bound driveways. While the resin bonded type is textured, not permeable and not SUDS compliant, resin bound driveways are permeable allowing water to drain through. They are therefore SUDS compliance and have a smooth, flexible, seamless flat surface.
Resin bound gravel can be installed by an individual as long as the base is suitable. Therefore, we have the DIY kit which can be used by any individual to install his averaged sized resin driveway.
Below are the important steps to take while installing with a DIY kit
First, our UVR resin DIY kit comes in two sizes which are the-
- 7.5kg UVR Bound plus
- 6.5kg UVR Bound
One thing we recommend importantly for any installation is that you ensure that the ratio of resin to aggregate stones is followed strictly.
7.5kg UVR Bound plus
- 3 bags of 25kg 2-5mm aggregates
- 1 bag of 25kg 1-3mm aggregates
- 6.25kg of C52 sand
- Total 106.25kgs - % resin 7.05%
This kit will cover approximately 3.55m² at a depth of 18mm and 4.0m² at 15mm depth.
6.5kg UVR Bound
- 3 bags of 25kg 2-5mm aggregates
- ¹/₂ bag (12.5kg) of 1-3mm aggregates
- ¹/₄ bag (6.25kg) of C52 sand
- Total 93.75kgs - % resin 6.9%
This kit will cover approximately 3.13m² at a depth of 18mm and 3.6m² at 15mm depth.
Ideally, when installing a driveway, a minimum of 18-24mm is recommended depending on the traffic. For pathways or patios, a 15mm depth can be used.
Before installing a resin bound gravel driveway, you need to consider the suitability of the existing surface. Check for cracks or any damage in the surface. If it is not able to carry the intended driveway, then it has to be excavated and a new base installed.
Please note the following:- Do not carry out the resin surfacing project if rain is forecasted during or with 4 hours of installing the drive or patio.
- Also check the relative humidity. A reading above 80% on an outdoor hygrometer is not ideal for a resin driveway project.
- Additionally, also ensure that you have a little excess of each material you need.
- Ensure your aggregates are not damp prior to mixing
- Ensure every material is sufficiently coated but do not over mix.
- Suitable subbases for a resin bound gravel driveway installation include- tarmac, asphalt and concrete.
- After installation, your new drive should be left to cure for at least 8 hours. We however recommend leaving the driveway undisturbed for about 24 hours before using.
- Do not carry out the resin surfacing project if rain is forecasted during or with 4 hours of installing the drive or patio.
- Also check the relative humidity. A reading above 80% on an outdoor hygrometer is not ideal for a resin driveway project.
- Additionally, also ensure that you have a little excess of each material you need.
- Ensure your aggregates are not damp prior to mixing
- Ensure every material is sufficiently coated but do not over mix.
- Suitable subbases for a resin bound gravel driveway installation include- tarmac, asphalt and concrete.
- After installation, your new drive should be left to cure for at least 8 hours. We however recommend leaving the driveway undisturbed for about 24 hours before using.
- UV stable resin
- Dried aggregates of your choice
- Forced action mixer to mix resin and aggregates
- Whisk paddle
- Gaffer tape
- Resin trowel
- Forced Action Pan Mixer
- Generator or power supply
- 5L /10L buckets, scrapers and small paint brush to clean the mixer
- Plenty of cleaning rags
- latex gloves
- Clean wheelbarrow – polythene liners recommended
- Clean shovel
- Gas burner and bottle
- Stiff brush
- Stopwatch
- Hard Barriers, Cones and Warning Tape
Step to Install a Resin Bound Gravel Driveway
The steps to install a resin bound gravel driveway, path or patio are outlined thus;
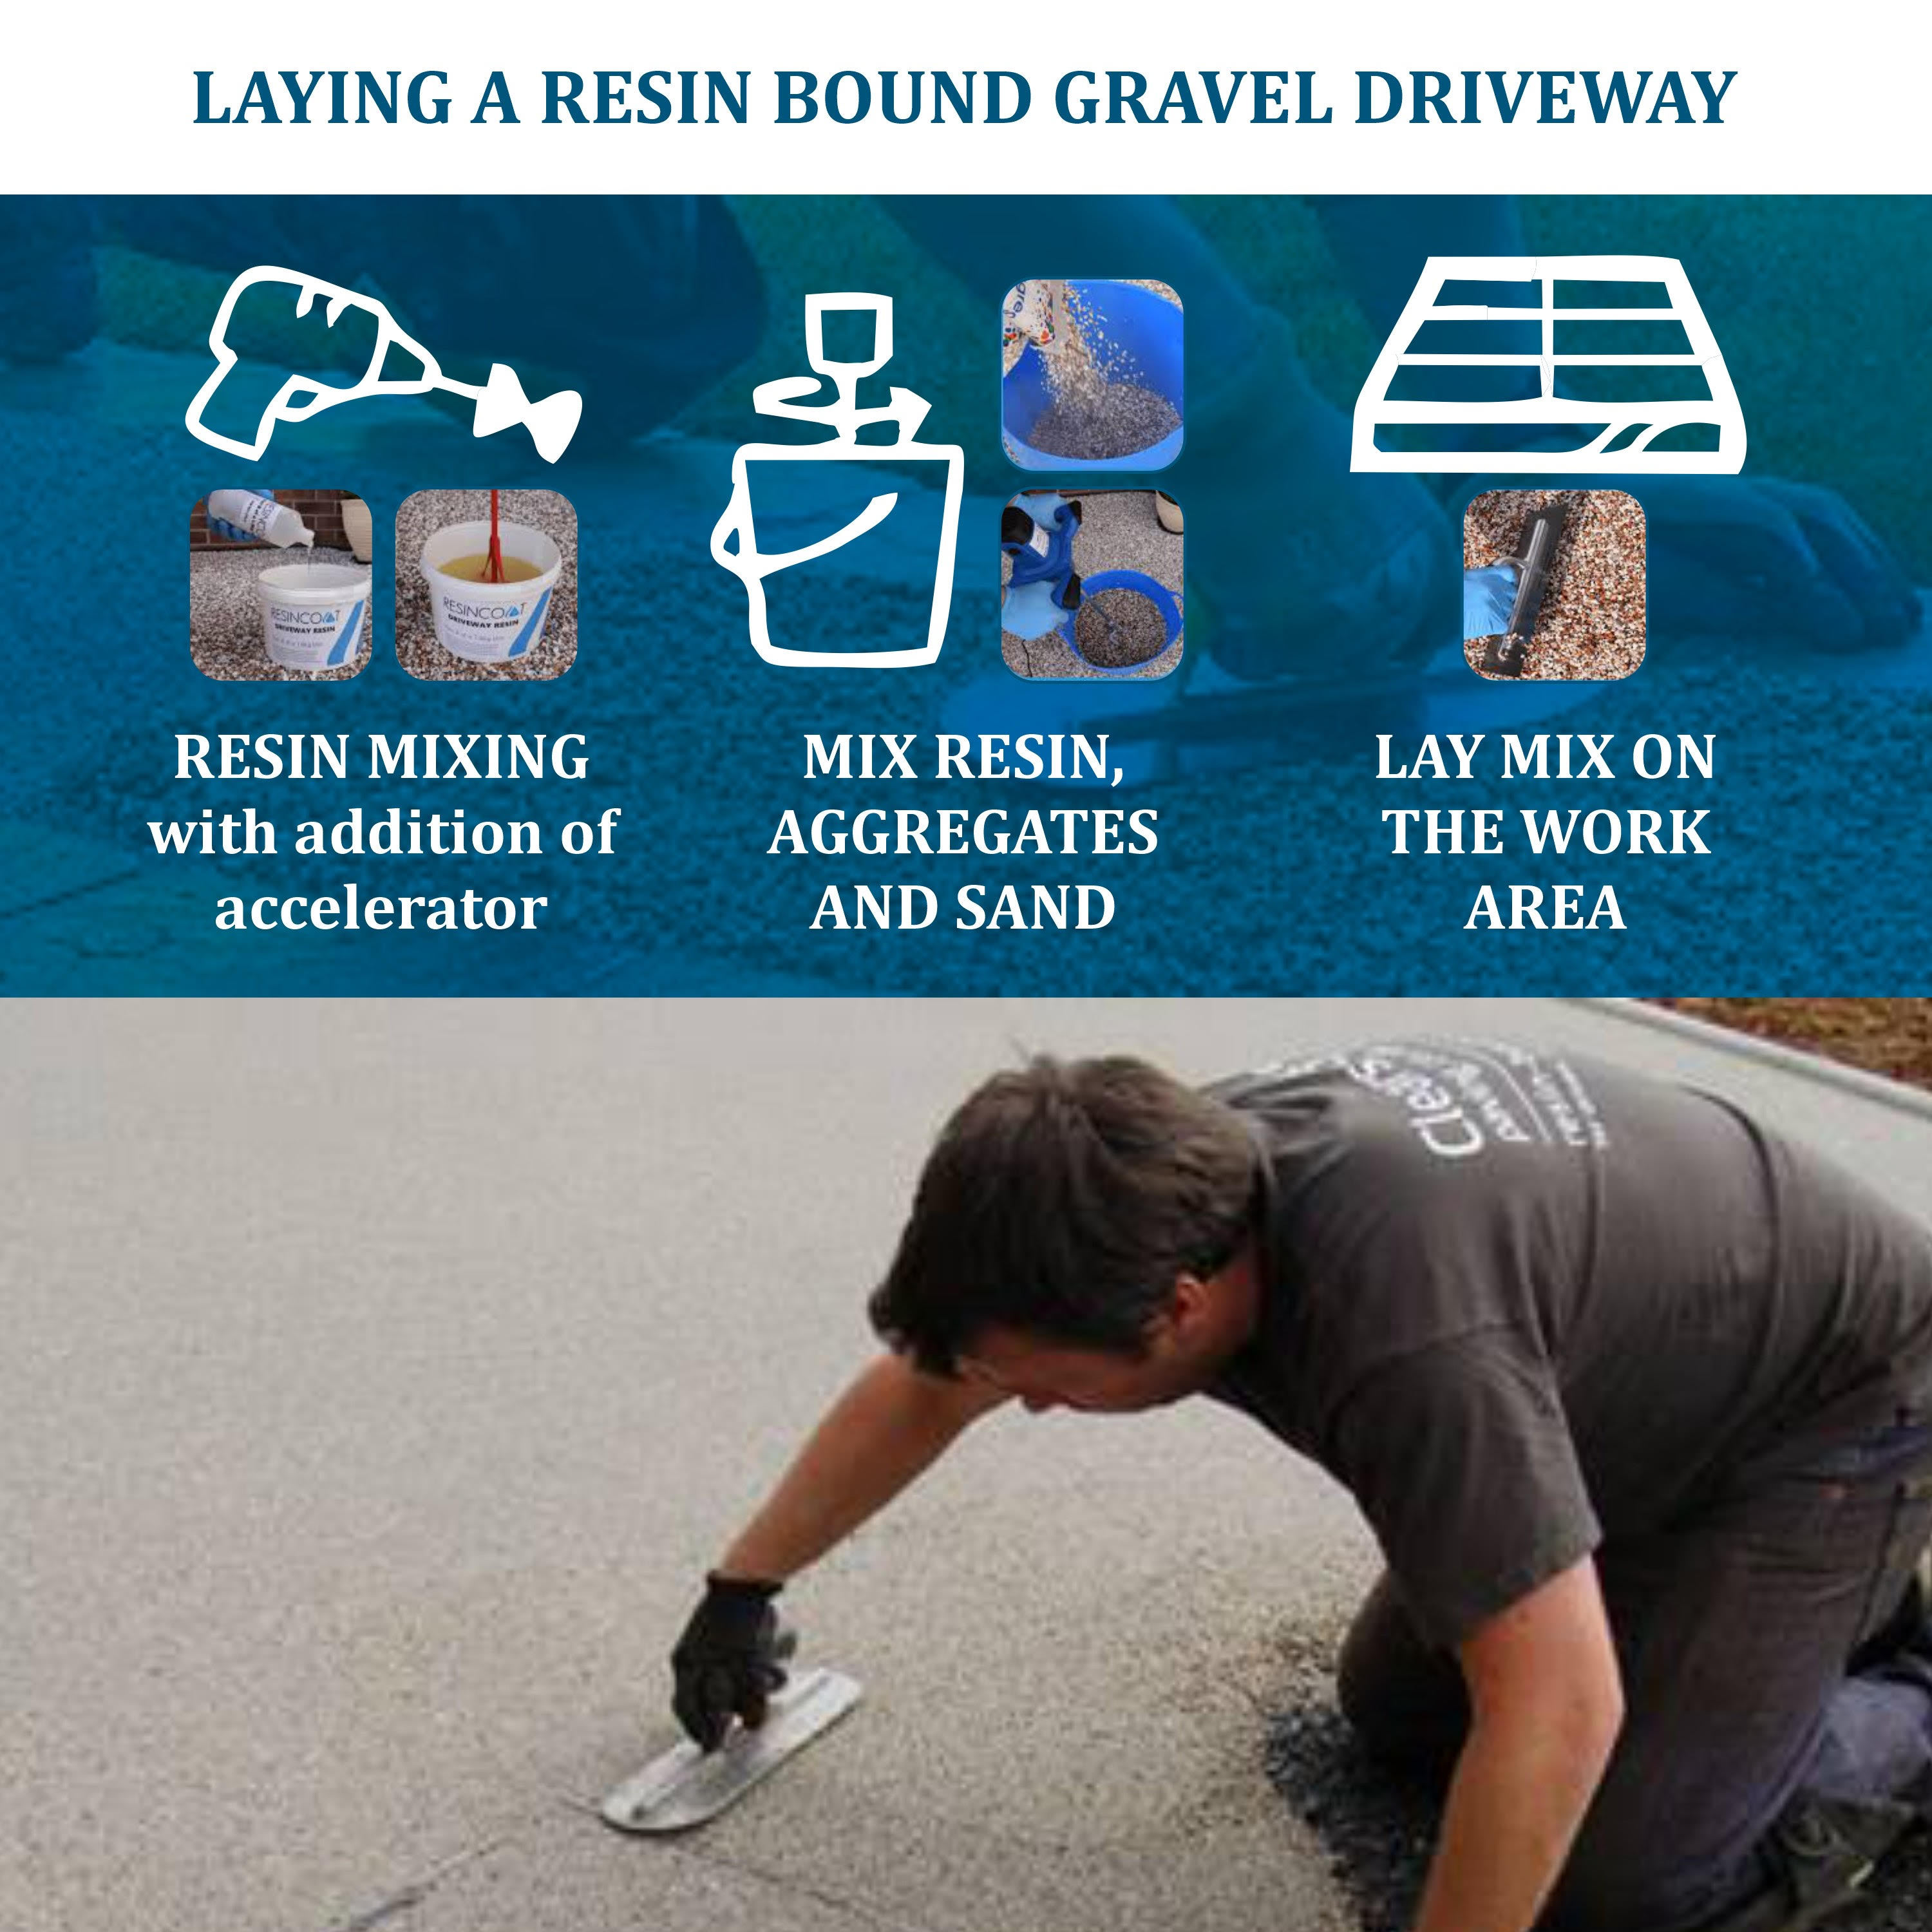
1. Resin mixing
This has to be done accurately to ensure a successful installation. We recommend that only one batch of product be used for a project to avoid variations.
First mix the part A component of the resin in a rubber container at slow speed for about 20 seconds. At this time, you can add an accelerator. Then add part B and mix for about 60 seconds until uniformity is achieved.
2. Mixing Resin, aggregates and sand
First pour one 25kg bag of 2-5 mm aggregates, and one 25kg bag of 1-3 mm aggregates into your Forced Action Mixer. Then add your already mixed resin. Start your stopwatch and take note of the duration of mixing.
Add the two remaining 25kg bags of 2-5 mm aggregates and slowly add your bag of C52 sand. Ensure that the mixing time after these bags is exactly the same as in the first bag added into the Mixer. Mixing has to be uniform to maintain colour uniformity. Do not mix for more than 4 minutes.
Transfer your mix into your plastic lined wheelbarrow, turn off your mixer and scrape out all the mix from the mixer. Clean your mixer after each mix to avoid particles of an initial mix contaminating subsequent mixes.
3. Lay Mix on the Work Area and Trowel
For you to have maximum control over your mix, pour the mix in manageable quantities and ensure an even spread of the mix. Do not pour too much at a time. At this fluid stage, you can check for inconsistencies and carry out any fixes or manipulations as you desire. When the mix has cured, it is difficult to correct an anomaly.
Use chalk or any guides to mark out how you plan to lay your drive. Batons can also help you know where to tip your mix. You can also use a screed bar to further even out the mix. Clean your trowel after about six strokes during the trowelling process. Clean the trowel with white spirit thoroughly each time you want to clean it. Allowing the trowel to become sticky will drag aggregates out of place.
Pack your aggregates accordingly into every angle and do not allow gaps. Also make sure that your aggregates are closely compacted to form a level surface. Use as few strokes as possible to even out your mix and polish or smoothen the surface once it is solid and level to leave an attractive sheen on the surface.
Mark the area clearly with cones and tape after you are done so that no one walks on the surface before it is ready.
Do You A Resin Install Guide?
If you are in need of professional guides for your resin surfacing, YourResinDriveway.com is here at your service. We are experts in installation of resin patios, resin pathways, resin driveways and lots more in the UK. As a household name in the driveway installation industry, with over 30 years of experience, you can expect nothing short of elegant, stunning and durable resin bound solution for your home.
Reach to us for creative resin patio ideas for your next resin bound driveway project.
You can call us on our helplines 01544 303 021 or fill out our online form and request for a free quote.